
How to manage your Plesk Onyx server's firewall
This guide will show you how to configure your server’s firewall to allow access to a specific service such as FTP, MySQL or SSH.
Manage your server's firewall
Log into your Plesk Control Panel and browse to Tools & Settings in the left-hand sidebar.
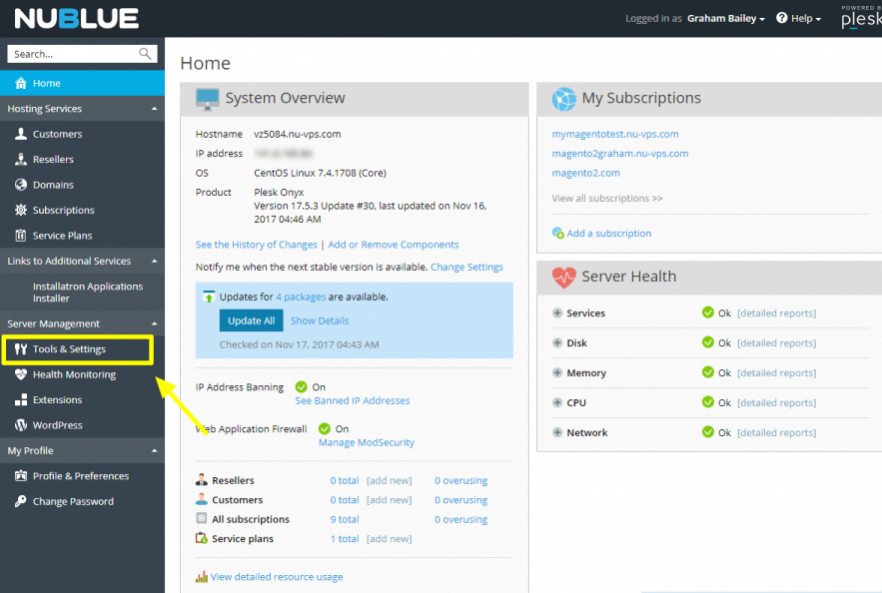
Select Firewall.
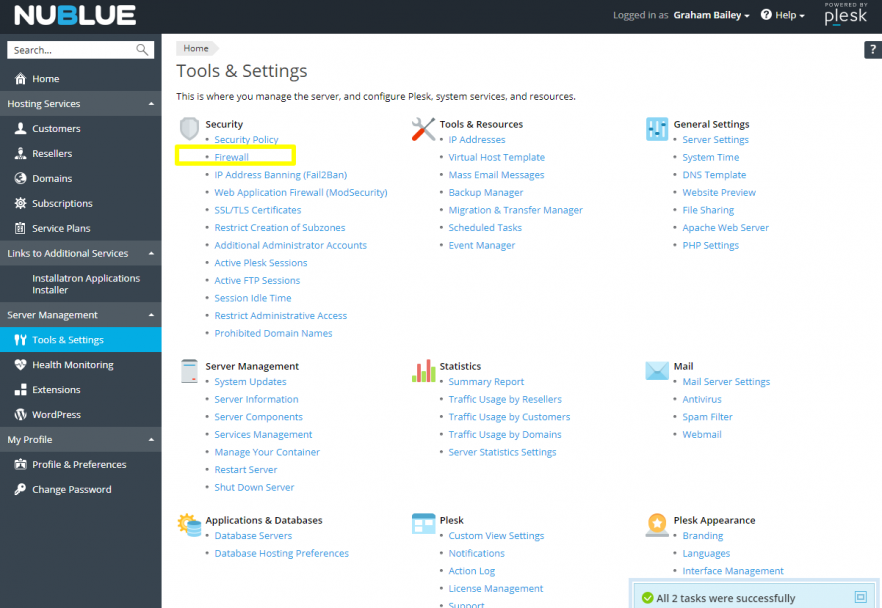
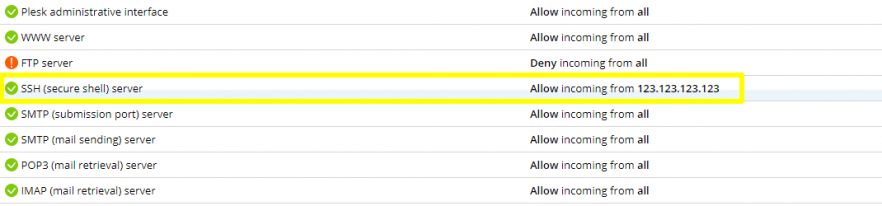
From here you can see your current firewall configuration, for example:

You can begin to edit your firewall configuration by clicking on Modify Plesk Firewall Rules at the top of the page.

In this example, we’ll modify the rule for SSH access but the same process applies for whichever service you need to enable. You’ll need to click on the rule for SSH (secure shell) server to edit it. In this example, SSH access is currently open to all IP addresses, but for security reasons I want to restrict it to just my own IP.

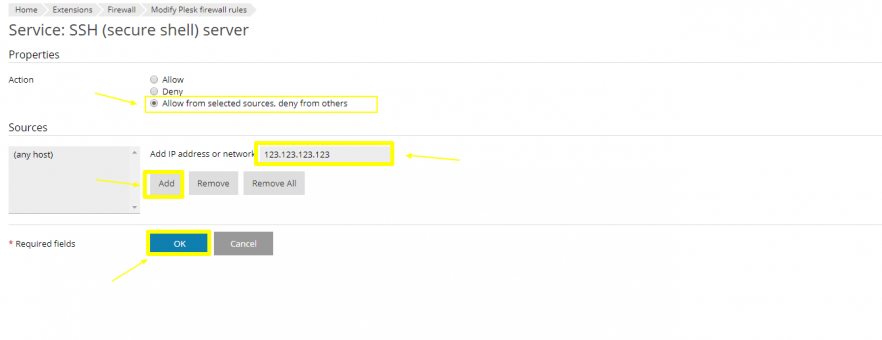
You can now choose whether to add your current IP to the firewall, lock access down completely or leave it open to all. For security reasons, we advise against choose the Allow option for services such as FTP, MySQL and SSH because this will allow access from any IP, potentially leaving your server open to attack. If you select Allow from selected sources, deny from others you can proceed to add your current IP address (find out your IP by visiting this page).
If you don’t have a static IP address and require one, you could speak to your ISP to see if they can provide you with one or look into purchasing a VPN solution. If you’re not connecting from a static IP address, you’ll need to revisit this menu to update your rule when your dynamic IP address changes to ensure that you’re still allowed access.
You can then enter your IP address (or addresses, if you need to allow access for a range of multiple users) then select Add and OK. In this following example, I’ve used a dummy IP address (123.123.123.123).
Following any change to your firewall, you’ll need to confirm them by clicking on Apply Changes…
… and then on Activate.
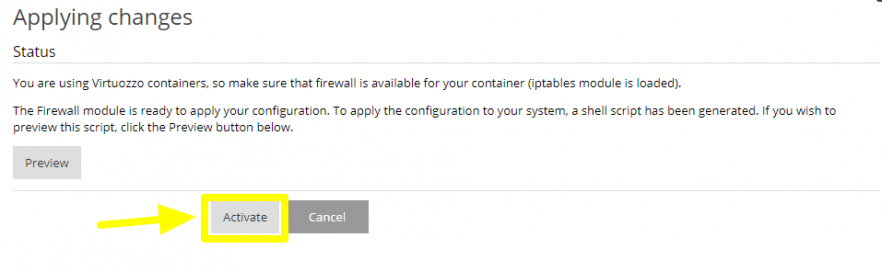
Following this your firewall should be updated correctly but you can check that the configuration is correct in the following screen.
And you’re done! You should now be able to proceed to SSH into your server. You can use this same method for managing any of the other rules in your firewall.