Installing Laravel on a Plesk Onyx server using Composer
Nublue hosting features the dependency management command line tool Composer as standard. When it comes to installing Laravel it makes sense to install from the command line as that’s also where a good deal of the development features of the system are also used. It also means you’re guaranteed to get the latest version.
This guide shows how to install Laravel using Composer on our VPS and Dedicated server platforms in the most secure and efficient way. We’ll be working with a fresh domain with no existing content.
To start, first create your domain name in your Plesk control panel. You’ll also need to enable SSH access for your domain via Web Hosting Access. (If you’re not sure how to do this, check out our guide here).
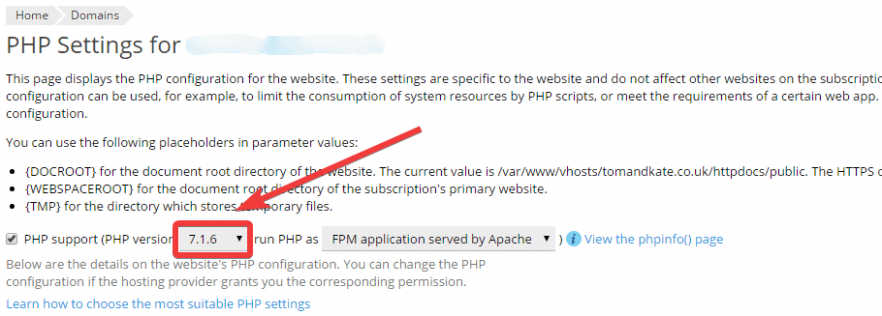
Now enable PHP 7.1 FPM via PHP Settings.
Now SSH into your domain using your SSH client of choice and clear out the /httpdocs directory as follows:
rm -rf ./httpdocs/*Now run the following command to install the base Laravel system in your /httpdocs folder:
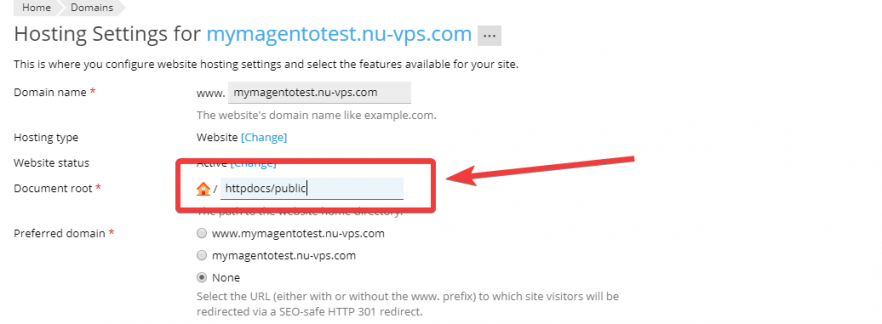
composer create-project --prefer-dist laravel/laravel httpdocsLastly, set the web root for your webspace to /httpdocs/public. This makes the core system non-web-accessible which will significantly improve the security of your site. To do this in Plesk go to Hosting Settings in your domains dashboard and update the document root accordingly.
That should be it in terms of initial Laravel setup. In terms of next steps, unless you’re already familiar with Laravel, Laracast’s Laravel 5.4 From Scratch free course is an excellent way to get a grounding in the fundamentals of building sites with the system. Have fun!
Nublue make award-winning bespoke projects with Laravel. Find out more here.