Introduction
Fail2Ban is a security module included in your Plesk control panel software. Fail2Ban logs failed attempts to connect to your server and blocks repeated offenders temporarily by IP address by adding them to a jail. This is great for server security but can sometimes lead to legitimate IP addresses being inadvertently blocked following failed attempts to connect. Typically we see these when a password has been entered incorrectly, but often an incorrectly configured email account can cause this issue too.
This short guide will show you how to ensure that your server’s Fail2Ban module isn’t blocking you from accessing your server.
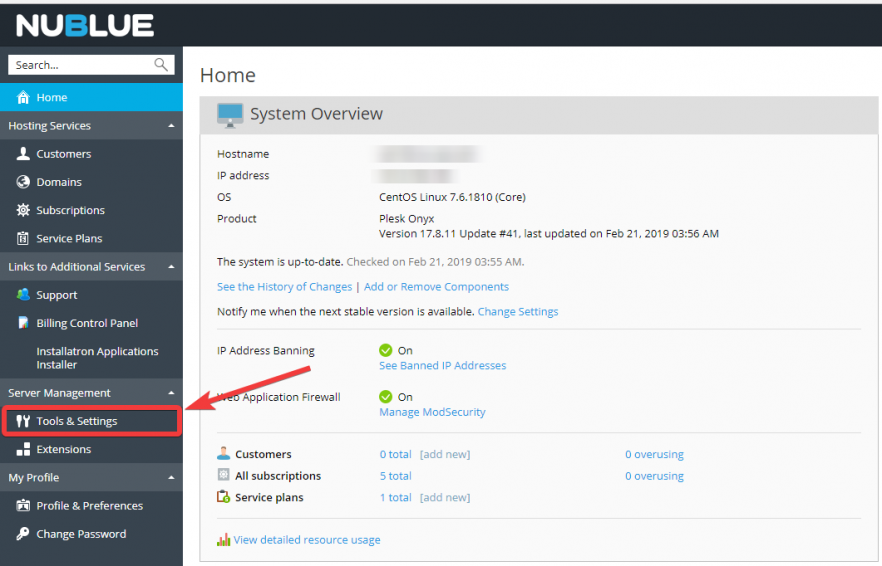
From within your Plesk Control Panel, browse to Tools & Settings in the left-hand sidebar.

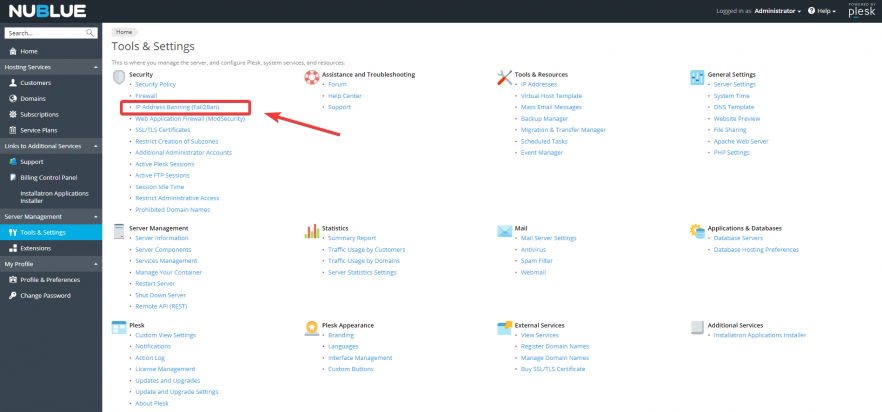
Select IP Address Banning (Fail2Ban).

Under Banned IP addresses, you’ll see a list of any IPs that are currently banned. Selecting the IP and choosing Unban will temporarily unban this address and allow it access again.

Alternatively you can select Move to Trusted IPs to add your IP address to a permanent trusted list.

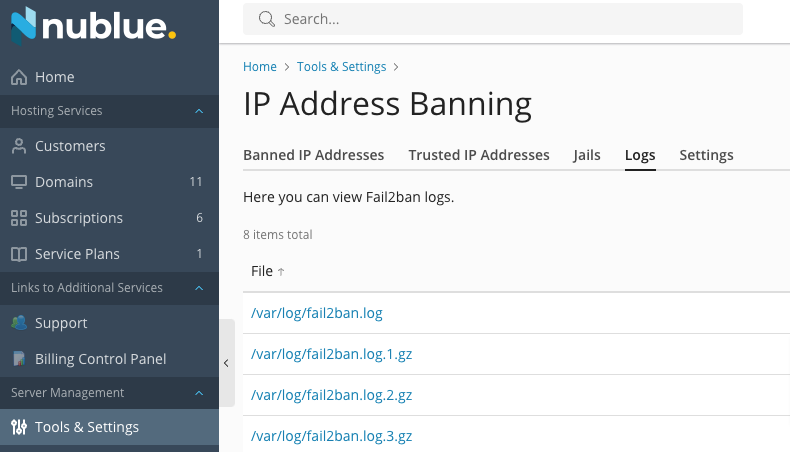
You can also browse to the Logs to see a history of previously banned address to determine whether your IP has been banned and subsequently unbanned recently.

You can view the log file by clicking on /var/log/fail2ban/log or download it by clicking on the arrow icon.

